
Sharma Orthopedic Surgical Insights & Clinical Blog
Knowledge Hub

Orthopedic Innovations & Clinical Blog

Expert insights, surgical technique guides, and medical device updates from industry leaders.

Global Orthopedic Updates & Research
Global Trends

Surgical Insights & Medical Tech

Exploring advancements in joint arthroplasty, trauma management, and spinal systems.

0%

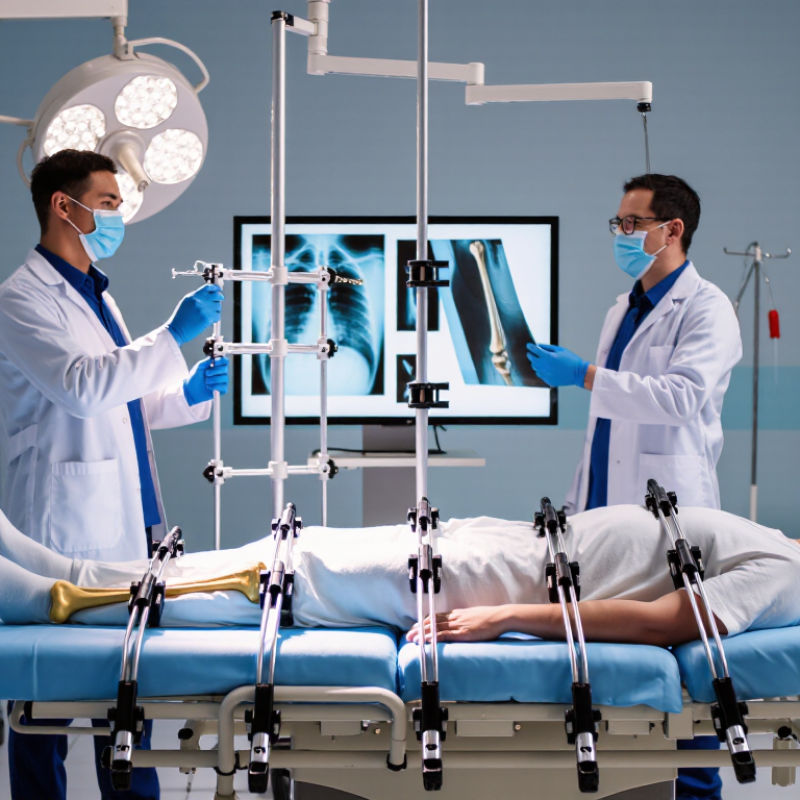
Choosing the right External Fixator Systems involves more than comparing prices or counting components. The frame must suit the fracture, the patient, and the planned treatment. A surgeon may weigh pin placement, bar configuration, adjustability, and access for wound care. Small details matter. A clamp that is awkward to reach can complicate adjustments, while a bulky frame may affect daily movement.

Reliable selection starts with clinical judgment and careful review of product information. Check the manufacturer’s specifications, compatible components, available sizes, and cleaning or maintenance requirements. Consider how the system appears on imaging and whether the clinical team can make planned adjustments safely. Published evidence and feedback from trained users can help, but they do not replace case-specific assessment. Fit is not everything.

This guide outlines practical questions for comparing frame designs, materials, stability, usability, and support. It also considers training, supply availability, and the quality of technical documentation. These factors can shape how confidently a team uses a system over time. No single design is best for every injury, and product claims should be checked rather than accepted at face value. Some trade-offs are easy to miss. A lighter frame, for example, may be attractive, but suitability depends on the complete clinical plan. The goal is an informed discussion between qualified clinicians and suppliers, grounded in patient needs and dependable evidence.
How to Choose the Best External Fixator Systems?

Identify the Clinical Needs and Fracture Characteristics

An external fixator should match the injury, not just the X-ray. Start by identifying the fracture’s location, pattern, and degree of instability. A short oblique fracture may need different control from a segmental break with several fragments. Look closely at the soft tissues too. Swelling, open wounds, bruising, and skin blisters can affect safe pin placement and the timing of treatment. Details matter. Imaging helps define the bone injury, but the skin and muscle examination adds information a scan cannot provide.

The patient’s overall condition also shapes the plan. Consider circulation, sensation, other injuries, mobility, and whether the patient can manage frame care and follow-up visits. For a temporary stabilizing construct, priorities may differ from those for longer-term fixation. Pin locations should be planned around the fracture, future surgical approaches, and nearby joints. There is rarely a perfect answer. A construct that looks straightforward on paper may be harder to manage when swelling changes or the patient’s needs become clearer. Recheck the plan. Experienced teams revisit the clinical goals as the injury evolves, rather than treating the first assessment as final.

Compare External Fixator Types and Configurations

External fixator systems differ in how their pins or wires connect and how many directions they control. A uniplanar frame places pins along one main plane. It can be relatively simple to apply and adjust. However, it may offer less control when a fracture shifts in several directions. Multiplanar frames use pins across different planes to improve stability. Circular frames use rings and tensioned wires, allowing fine adjustments around complex fractures. More adaptable, but bulkier.

Hybrid configurations combine elements of these designs. The right choice depends on fracture location, bone quality, soft-tissue condition, and the access needed for wound care or other treatment. Pin spacing and frame clearance matter: a bar too close to the skin can irritate tissue, while poorly positioned pins may limit useful adjustment. A practical planning check is whether the frame can stabilize the fracture without blocking necessary care. Sometimes the initial configuration needs revision as swelling changes or imaging reveals alignment concerns. That trade-off is easy to underestimate. Selection and adjustment should be guided by an orthopedic specialist familiar with the injury and the patient’s follow-up needs.

Assess Materials, Adjustability, and Imaging Compatibility

Material choice affects stiffness, weight, and image quality. The ASM Handbook reports elastic moduli near 193 GPa for stainless steel and 110 GPa for common titanium alloys. These figures help explain why the same frame geometry may feel different under load. Carbon-fiber composites can be lighter and more radiolucent, but their properties vary with fiber direction and construction. Ask for material specifications, not just a “lightweight” claim. Check the details.

Adjustability matters at the bedside and during follow-up. Look for clamps that allow controlled changes in alignment without forcing staff to dismantle the frame. Test whether adjustment tools fit around dressings, and whether locking components remain accessible after swelling changes. Small practical details can become frustrating. I would also ask how the system handles repeated adjustments; published product data may not reflect a busy ward’s reality.

Imaging compatibility needs a device-specific check. Carbon-fiber components generally create fewer radiographic obstructions than metal, but metal pins, clamps, and connectors can still obscure anatomy or create CT artifacts. For MRI, do not infer safety from one component’s material: the complete assembly and its conditions of use matter. The American College of Radiology’s Manual on MR Safety recommends assessing implants and devices for MR-related risks. Confirm the manufacturer’s labeling and local imaging protocol before scanning, and review a sample image if available. A clear image is useful evidence. A material name alone is not.

Review Safety Features and Ease of Use

Safety features deserve close inspection when comparing external fixator systems. Check that clamps lock securely and remain stable under the loads expected for the intended application. Pin compatibility, frame rigidity, and clear adjustment markings also matter. Small details matter. A clinician should review the device instructions, material information, and cleaning requirements before use. Do not assume that a familiar-looking design is intuitive; unclear steps can lead to avoidable setup errors. Ease of use supports safety, but it cannot replace training or careful assessment.

Consider how the frame handles in a real clinical workflow. Are components easy to identify with gloves on? Can adjustments be made with the supplied instruments, without awkward hand positions? Clear labeling and a manageable number of parts can reduce confusion during assembly. Access for imaging and routine wound care may also affect usability. Ask trained users to assess these tasks, rather than relying only on product descriptions. Not always obvious. A system that feels simple during a demonstration may become fiddly under time pressure. Record any difficult steps, and compare them with the manufacturer’s guidance and the patient’s clinical needs.

How to Choose an External Fixator System

Compare systems using consistent safety and usability criteria. These suggested review-priority scores are a decision-making framework, not clinical outcome data or ratings of specific products.

Score each system against the same criteria and verify details with its instructions for use and your clinical team. Prioritize pin-site access, frame stability, and safe adjustability for the intended application.

Match System Capabilities to Patient and Treatment Needs

Choosing an external fixator is less about maximum adjustability and more about matching system capabilities to the patient. Consider the injury, anatomy, and daily care needs. For a swollen, high-energy fracture, a temporary frame may need clear wound access and straightforward pin placement. Someone with limited hand strength may need controls that are easy to inspect and adjust. Small details matter.

Clinicians should compare frame stability, modularity, imaging access, and options for controlled adjustment. Treatment plans also differ: temporary stabilization, gradual correction, and longer-term support place different demands on a system. Check that connectors are intuitive and cleaning around pin sites is practical. Age, skin condition, mobility, and caregiver support can all affect usability. It is easy to overvalue technical features and overlook the patient’s routine. That deserves a second look. Selection and adjustment should remain guided by trained clinicians and the individual treatment plan.

Tips: Before choosing, picture a real care task: inspecting a pin site, positioning the limb for imaging, or helping a patient move safely. Ask the clinical team to assess these needs together. A useful system must work beyond the operating room.

FAQS

What should guide the choice of an external fixator?

Match the frame to the fracture’s location, pattern, and instability. Consider soft-tissue damage and the patient’s overall condition too.

Why assess the skin and soft tissues?

Swelling, bruising, open wounds, and blisters can affect pin placement and treatment timing. Imaging alone cannot show the whole picture.

How do uniplanar and multiplanar frames differ?

Uniplanar frames control movement mainly in one plane. Multiplanar frames offer control from several directions, which may help with shifting fractures.

When might a circular frame be considered?

Its rings and tensioned wires allow fine adjustments around complex fractures. It can be bulkier, so daily care deserves consideration.

What should be checked when planning pin and frame positions?

Check pin spacing, skin clearance, nearby joints, and access for wound care. A bar too close to the skin may irritate tissue.

What safety details matter when reviewing a system?

Check secure clamps, frame rigidity, pin compatibility, and clear adjustment markings. Read the device instructions and cleaning requirements.

How can teams judge whether a frame is easy to use?

Trained users can test component handling with gloves and supplied instruments. Imaging and wound-care access matter too. Not always obvious.

Should the initial frame plan remain unchanged?

Not necessarily. Swelling or imaging findings may call for reassessment. Even a tidy plan can miss practical problems that appear later.

Who should guide frame selection and adjustment?

An orthopedic specialist familiar with the injury should guide decisions and consider follow-up needs. A simple-looking setup can still be fiddly.

Conclusion

Choosing the right External Fixator Systems begins with a clear understanding of the fracture’s location, stability, and complexity, as well as the patient’s overall condition and treatment goals. These factors help determine whether a simple or more versatile configuration is appropriate and what level of support and adjustability may be needed during healing.

A careful comparison should also consider construction materials, compatibility with imaging, and features that support safe, efficient application and routine adjustment. Ease of use matters for clinicians, while comfort and practical care requirements matter for patients. By weighing these considerations together, treatment teams can select a system suited to the clinical situation, expected course of treatment, and individual patient needs.

Lillian

Lillian

Lillian is a seasoned marketing professional dedicated to helping organizations communicate their value with clarity, credibility, and purpose. With a strong understanding of the company’s products, services, and customer needs, she combines market insight with practical industry knowledge to......